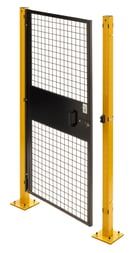
 Husky Rack & Wire’s machine guarding systems are well-known for their versatility, reliability and affordability. Safeguards are essential to ensure worker safety from the risks that wander inside an industrial environment. In dynamic situations, not only does the guarding mechanism ensure maximum protection, but it should also be as simple as possible.
Thankfully, Husky’s Guarding systems have been designed in a modular manner, allowing them to be retrofitted in a short duration of time with minimum training. We’ll show you how to completely assemble and install a guarding around one of your machines.
Before you begin, you should make sure you have all the adequate tools to carry out the operations. It is recommended that you have a safety ladder, chalk line, carpenter level and heavy-duty wire cutter on hand. In addition to these, the following tools are compulsory:
The floor anchors and matrix shims are included in the package. In addition to these, you’ll need to have various drill bits in hand as well as a tape measure. Safety items like gloves, googles, steel toe shoes and hardhat should be provided to all workers.
Now it’s time to get your hands dirty, but before you do so you should make sure you have all the necessary parts from the bill of lading. Next, clear the installation area of any obstructions, turning off any machinery that may cause a halt in operations. You should be open to the idea of temporary bracing during installation as the guarding is unstable until it is completely fitted.
Post/Panel Installation
Prior to installation, loosen the chalice bolt on the panel. Once it is in place, tighten it until the post is firm. Do not overtighten the bolt, as it would only bring it closer to mechanical failure. The chalice bolt is permanently attached to the left and right bottom clips on the panel, and shouldn’t be tampered with from that end.
Adjustable Corner Post
The posts have the same slot punch as the line and door posts, and can be installed in a similar fashion. They are attached by hinges so that they can be adjusted according to the angular deviation required by the designer.
Single Swing Door
 Before you begin, you should know that the 6” high system doesn’t come with a transom panel whereas the 8” one has a 78” door and a 1’ transom. The installation procedure is simple.
Locate the post marked with “Swing Door Post” label, and install it using 5/16” x 3” carriage bolts. The slotted holds in the doors are already present so you won’t have to do any drilling. Finally, install the strike bar in a similar way, and that’s it.
Double Swing Door
This is a little more complicated compared to a single swing door.
Single Tunnel Door
The tunnel door posts would be labelled “Tunnel Door Post”. Install the posts and the panel in-between. Next, measure the center to center distance between the square holes of both the posts followed by the distance between the L-brackets on the sides. Both these dimensions should be less than 1/16”, otherwise you should loosen them up.
Keeping the L-brackets in the center, and using the carriage bolts, install the door panel. Finally, check for any alignment errors by repeatedly opening/closing the door. The Double Tunnel Door can be installed through a similar procedure.
In summary, Husky’s modular approach to guarding systems is quite valuable when it comes to saving time during initial installation and if the need for customization arises.
Interested in learning more about Husky Rack and Wire products?
You may also be interested in reading:


